 Store Location
How To Replace Painted Drywall With Knotty Pine Paneling
Adding knotty pine paneling to walls is a growing trend. Replacing painted drywall with knotty pine paneling involves removing the drywall first and installing tongue-and-groove boards on the wall framing. An option is installing the paneling boards directly over existing drywall. Key steps include selecting a layout pattern, measuring for square footage, ensuring proper insulation, leveling as you go up, using a nail gun for installation, and applying stain and/or a protective clear coat to prevent yellowing.
Why Use Knotty Pine Paneling
Knotty pine paneling is a popular, affordable, and durable choice for adding rustic charm, warmth, and natural beauty to homes, cabins, and commercial spaces. Modern tongue-and-groove (T&G) designs with end-matching allow for fast, easy, and low-waste installation, often allowing for DIY, while pre-finished options save significant labor and time. Consider the key reasons homeowners like it so much:
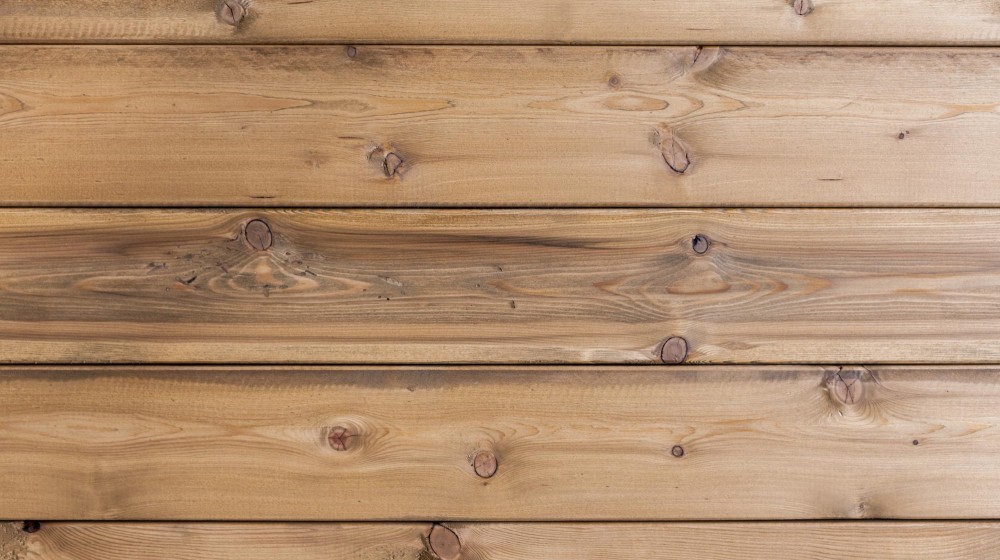
- Aesthetic Appeal & Versatility: Provides a rustic, cozy, and timeless look with distinct knots and color variations (light yellow to pinkish-tan). It can be installed horizontally, vertically, or diagonally to suit various decors.
- Easy, Efficient Installation: Modern tongue-and-groove, end-matched boards mean you don't need to cut on wall studs, reducing waste by up to 20%.
- Cost-Effective: It is often considered the most affordable wood paneling option compared to other lumber, offering a high-end look without the high-end price tag.
- Durable & Low Maintenance: Pine is strong, stable, and when properly sealed, it lasts for the life of the home.
- Pre-Finished Options: Ordering pre-finished panels saves up to 50% in labor, eliminating the need to stain or paint on-site while providing a consistent, high-quality finish.
- Sustainability: Pine is a renewable, sustainably sourced, and eco-friendly building material. Thousands of new trees are planted each year for future use.
Option 1: Remove Drywall, Then Install Paneling
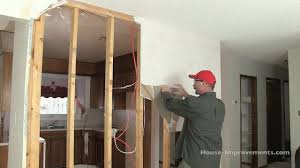 Begin by (1) turning off electricity and checking for water pipes, wiring, and hazardous materials behind walls. Next, (2) lay down a rubber mat or other thick protection for the floors. Score corner joints with a sharp utility knife and use a pry bar to pull drywall off in large pieces to minimize dust. Locate studs to pry from with a stud finder or magnet and remove screws or nails with a hammer. Inspect the insulation, and add more or replace any bad insulation. Wear eye, nose, and mouth protection gear for safety. Some old houses have lathe and plaster walls that take longer to remove.
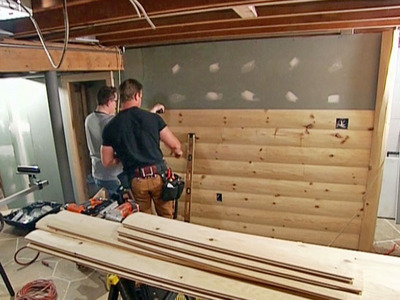
To install knotty pine paneling on the wall framing, make sure there are enough surfaces to nail it up. It may be necessary to install short horizontal blocks between wall framing, depending on your specific pattern. Level the bottom piece and place tiny pieces of wood under it to keep it off the floor. Nail the first piece of paneling into the wall framing, and saw off the end piece to start the next row. Go on up to the top by tapping each piece into place with a short board and mallet, and adequately nailing it. The end-matching design allows you to end-butt two pieces on or between wall framing. Add the trims, moldings, baseboards, and then apply the finish.
“Key steps include measuring for square footage, ensuring proper insulation, leveling as you go up, using a nail gun for installation, and applying stain and/or a protective clear coat to prevent yellowing,”
Option 2: Install Knotty Pine Paneling Over Drywall
 To install knotty pine paneling over existing drywall, start by following the first two steps in option 1 above, and then do the following:
- Preparation: If installing over drywall, locate the wall studs and mark them with a stud finder or strong magnet. Use longer nails than in option 1 because you must go through the drywall. Electrical outlets, switches, and light fixtures must be extended out further into the room and secured to allow for the extra paneling thickness.
- Installing Furring Strips: If the walls are uneven or not flat, install 1×2 or 1×3 wood furring strips to correct the walls. Nail them horizontally (if installing planks vertically) or vertically (if installing planks horizontally) into the stud
- Installation: Start in a corner with the tongue side up (or facing the next board). Use a nail gun to fasten the boards, preferably at a 45-degree angle through the tongue (blind nailing). Follow the installation steps in option 1 above.
- Trims and Finishing: Install trims, molding, and baseboards, and apply stain and/or stain with a clear top coat, or a top coat only.
Tools And Materials Needed
If you plan to complete the project yourself, you will need essential tools and materials to do a professional job. If you already have them, great, but if not, buy, rent, or borrow them.
| Tools | Materials |
| Level and tape measure | Knotty pine paneling |
| Stud finder and nail gun | 16 or 18-gauge nails |
| Miter saw and stand | Small leveling blocks |
| Pencil and large square | Stain and clear coat finishes |
| Eye protectio | Trims and moldings |
| Ear protection | Protection for floors |
Tips For Success
Some recommendations are needed to create a successful paneling project. Careful planning will save time, effort, money, and some mistakes by following these ideas:
- Acclimate Wood: Allow the pine to acclimate in the room for several days before installation to prevent shrinkage.
- Layout Pattern: Vertical installation makes walls look higher; horizontal makes rooms look wider. Diagonal layouts and unique designs are other options to consider. Decide which layout you want before ordering the paneling so you won’t over or under estimate the amount needed.
- Outlet Extensions: Remember to extend electrical boxes, outlets, switches, and light fixtures to match the new, thicker wall depth.
- Trims: Use knotty pine matching trim for corners, ceilings, baseboards, and around doors and windows to complete the look.
Drywall can be disposed of by taking it to a local landfill/transfer station, hiring a junk removal service, or renting a dumpster, with recycling options often available for cleaner materials. Small amounts may be accepted in regular trash, but large quantities usually require specialized disposal. Usable pieces can be donated to various organizations.
Knotty pine paneling installed and finished professionally is a beautiful sight to behold! Make your order for paneling, trims, moldings, baseboards, finishes, and give us a call.


