 Store Location
Wiring And Plumbing A Log Siding Cabin
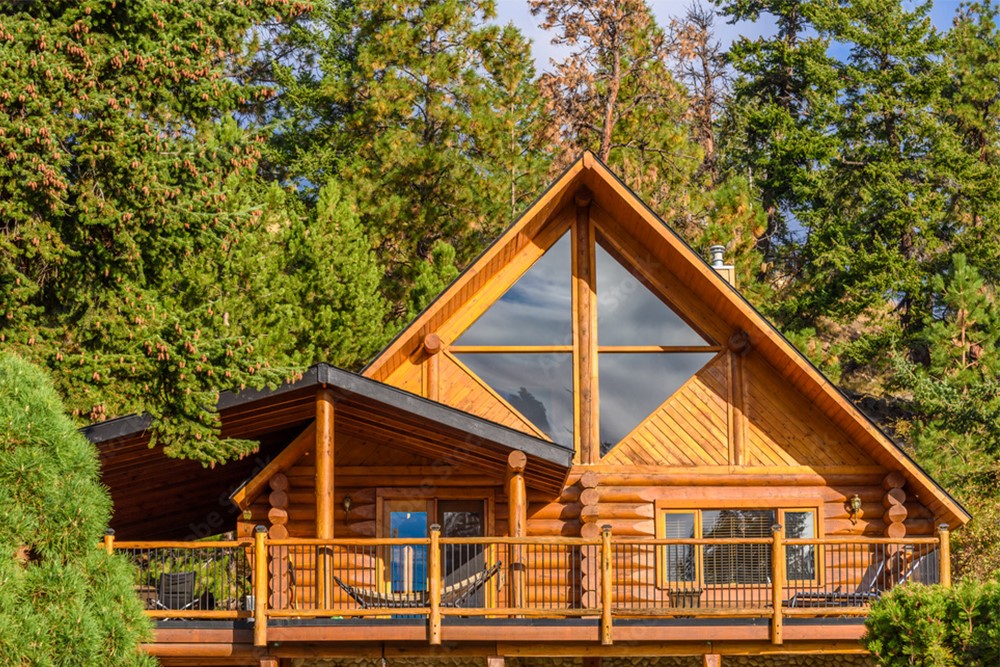
Wiring and plumbing a home are two essentials required for having electricity and water. Both are more easily installed for a pine log siding home than a round or square full-log home. They are placed in the walls in much the same way as a conventional home with a few modifications. Traditional carpenters and contractors can install the log siding, while electricians and plumbers are needed for wiring and plumbing projects.
How Pine Log Siding Is Installed Outside And Inside
Pine log siding is milled in a “D” shape which comes from the outsides of logs. The center pieces are used for other purposes, such as log trims, knotty pine paneling, and flooring. The thicknesses and widths that are available include these profiles:
Quarter Log: 2” thickness and 6” and 8” widths
Half Log: 3” thickness and 6” and 8” widths
Premier Log: 3” thickness and 8” and 10” widths
Smooth Surface: Available in all three profiles
Hand-Hewn Log: Available in Premier Log only
Pre-Finished Siding: Available in all profiles
Corner logs are installed first, followed by door and window trims, then the siding. All are secured to conventional wall framing with long galvanized screws that stand up to the elements. After the exterior walls are installed, the wiring and plumbing are put into place inside the walls. Insulation is next placed in the walls followed by installing the interior log siding and trims.
Wiring And Plumbing Cabins: Wiring The Cabin
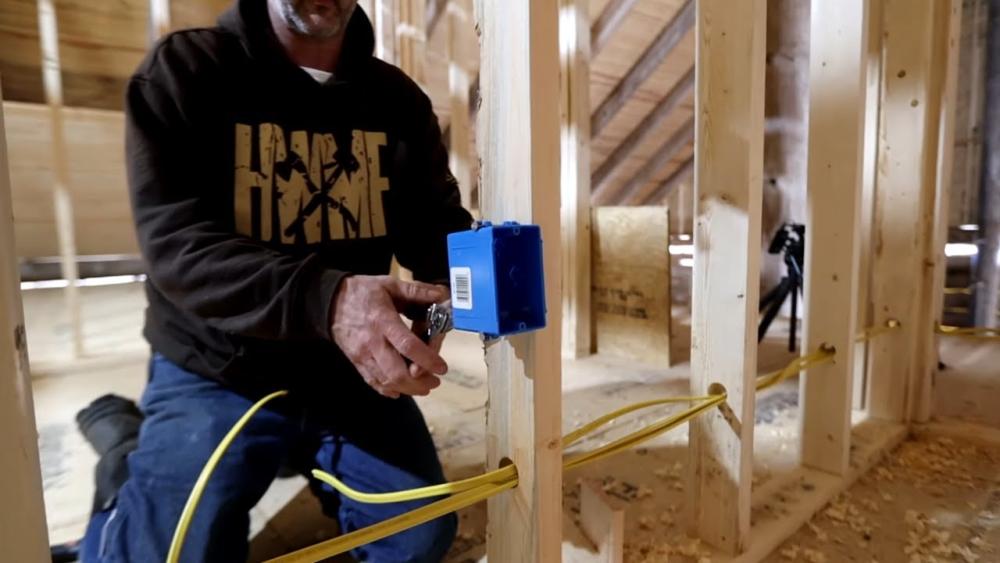 Houses are wired with a network of insulated copper wires, typically in nonmetallic cables. They carry electricity from the main service panel to outlets, switches, lighting, and appliances. These circuits are generally wired in parallel, allowing devices to operate independently. The main panel contains circuit breakers that protect against overloads and shorts.
- Switch and outlet boxes are attached to wall framing to meet wiring codes for 120 volt circuits and devices.
- They are typically connected with NM cables that contain multiple insulated wires and a ground wire.
- Each circuit in a log cabin is protected by a circuit breaker in the main panel.
- Some appliances, such as ranges and water heaters, require 240 volt wiring.
- All fixtures and lighting are installed into place.
- The circuits are tested individually and any corrections are made.
- The outlet and switch plates are mounted on the wall boxes.
Wiring a log home made with pine log siding is much easier and faster than wiring a full log home. Full log homes require drilling many holes in the logs and cutting some channels for wiring. This work is avoided because each piece of siding and trim is secured individually to the wall framing after the wiring is completed for easier access. Small slots are cut out of the siding for the electrical boxes and covers before that row is installed.
“Wiring and plumbing a home are two essentials required for having electricity and water. Both are more easily installed for a pine log siding home than a round or square full-log home.”
Wiring And Plumbing Cabins: Plumbing The Cabin
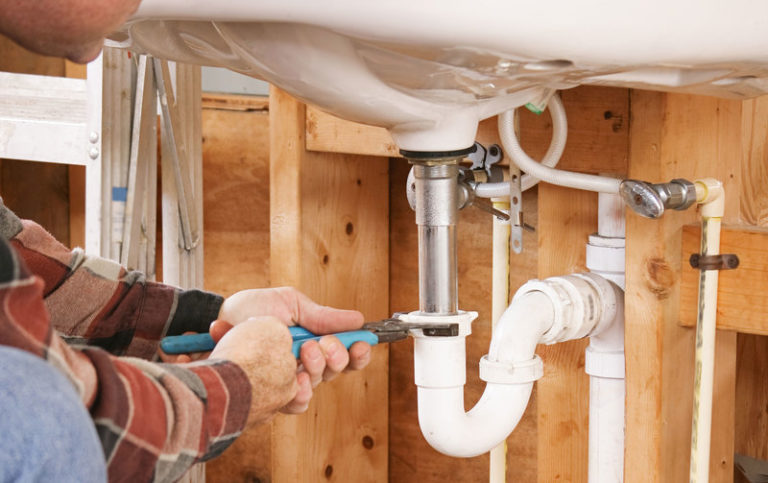 Plumbing is installed in a log cabin in three main phases: underground, rough-in, and finishing. The process begins with underground plumbing, where water and sewer or septic lines are laid and connected beneath the cabin. Next, during the rough-in phase, pipes are installed within walls and floors to connect fixtures. Finally, the finishing phase involved installing fixtures like sinks, tubs, showers, toilets, and faucets.
- Underground Plumbing: This initial stage involves trenching and laying the main water supply and sewer or septic lines, as well as underground drainage pipes for rainwater. The goal is to establish the basic plumbing infrastructure that will connect the house to the local water and sewer systems.
- Rough-In Plumbing: This phase takes place after the foundation is laid and walls are framed, but before the walls and floors are finished. Plumbers install water supply pipes (hot and cold), drain lines, and vent pipes within the walls and floors, connecting them to the underground system. This step also includes strategically placing pipes and valves to connect to future fixtures like sinks, toilets, tubs, and showers. Pipes are tested for leaks by filling them with water and making any necessary corrections.
- Finishing Plumbing: This part of the project takes place after the walls and flooring are complete. Fixtures like sinks, toilets, and faucets are connected to the installed pipes and drains. The final inspection and testing of the entire plumbing system are conducted to ensure proper functionality and address any leaks or issues.
Wiring And Plumbing A Cabin Is Best Left To Professionals
Wiring and plumbing any house is a tedious and challenging project. Amateurs may think they have the required skills to take on the work, but unless they do they can create hazardous situations. Get three estimates for wiring and plumbing from licensed and trusted contractors to be safe and guarantee long-term success with your log siding cabin.


