 Store Location
How To Install Pine Log Siding On A Cabin
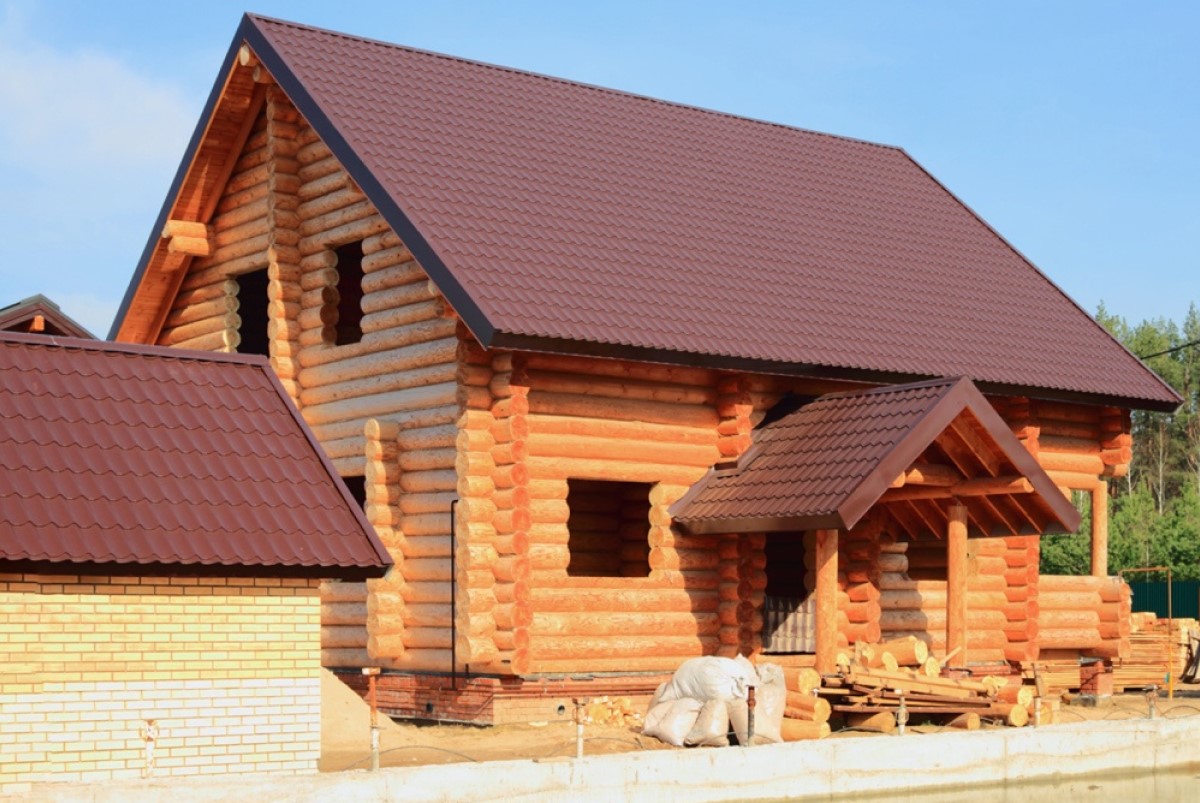
A log cabin is the dream of thousands of Americans each year, located near a lake, mountain, river, ocean, or in a forest. If you plan to build a cabin yourself or with friends and family, you should follow standard guidelines for the type of log siding you desire.
You should have the necessary woodworking knowledge, skills, and tools to do a professional job. The most economical way to build a log cabin is using pine log siding attached to conventional wall framing. It provides the full log look without the full log price and drawbacks.
Pine Log Siding Composition
 Pine log siding is real wood siding, not a synthetic look-alike material that some companies manufacture. It is affordable and efficient in these ways:
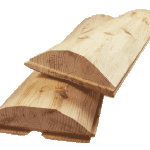
- Each piece is milled in a “D” shape from select red pine trees.
- Pine log siding is more cost-effective than full logs.
- Its installation is faster and easier, requiring less shipping costs. and specialized labor than full log construction.
- Pine log siding is virtually a “no-waste” sustainable product.
- Siding with the tongue and groove, end-matching system reduces waste, measuring, sawing, and labor. It is available in unfinished and pre-finished conditions.
- This material is available year-round in inventory, and there is a shorter startup time to locate a contractor and get the project going. Here are more pros you can appreciate.
Before You Begin
In this scenario, we are assuming a contractor or you have built the wall framing and roof. Before you begin installation, stack the wood siding for several days protected from the weather to acclimate to your local humidity and temperature levels. Do not let the bottom row touch the ground if storing outdoors. Ensure the wall is properly sheathed, has a vapor barrier in place, and windows and doors are sealed before installing the log siding.
“The most economical way to build a log cabin is using pine log siding attached to conventional wall framing. It provides the full log look without the full log price and drawbacks.”
Pine Log Siding Installation Begins
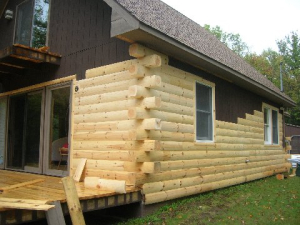 The log siding boards are attached individually, one row at a time, working from the bottom up. Always start with the tongue up because this will speed up installation and help prevent water from being trapped between the boards. Ensure the first row is level and is above the ground.
When the siding boards are secured to the wall, they should be secured to the studs if possible. It’s best to use galvanized or stainless steel fasteners, and the brand we recommend is Oly Log Screws. Only the first row of siding will need face nailing or screwing along the bottom to secure it. Use an electric drill and bit that snugly fits the fastener heads for this application.
- After the first row is installed, the only screwing necessary is through the tongues on a downward 45-degree angle into the stud wall. The next row of siding will lock into the tongue and hide the fastener giving you an authentic log look.
- Ensure each screw head is countersunk below the surface of the wood so the next row of siding can easily slide into place.
- The end-match system allows for easy installation by tapping along the top of each piece with a rubber mallet and screw in to form tight joints. This tongue and groove system minimizes cutting and measuring the siding.
- When you come to the end of a row, the piece you cut off will be the starter for the next row at the opposing end. When you come to window and door log trim, the piece you cut off will be used on the opposing side of the window or door.
- The random lengths ensure you receive all usable products that allow staggering and breaking up the joint pattern for greater structural integrity.
- Notice the milled relief cut in the back of the siding allows air to move freely behind the siding, keeping the logs straighter and dryer.
Installing Vertical Corners And D-Trim
Some additional notes on installing corners, trims, and caulking are in order. Corner and D-trim pieces must be installed before the siding. By installing them first, you will significantly reduce the overall installation time and save money if you are paying someone. If you are using the popular vertical log corners, secure them with Oly Log fasteners through the face of the corner into the stud wall behind. Follow these additional ideas for successful completion of your work:
- The vertical log corners are notched to fit on a 90-degree corner, with a flat surface on either side to accept the log siding.
- The trim is also secured through the face with the Oly Log fasteners, but can be toenailed/screwed on as well.
- When using Oly Log fasteners on the corners or trim, use one every two to three feet.
- Other corner log styles are available through our affiliate The WoodWorkers Shoppe.
Any log siding home will need some caulking, which helps prevent insects and moisture from entering behind the siding and potentially causing problems. The end-matching system eliminates 80% of caulking because the joints fit tightly together. The only recommended caulking areas are on butt joints where the joints aren’t tongue-n-grooved or end-matched. This is most common when the siding butts into the corner and trim pieces.
On any log home or wood-sided home there is always caulking involved, which helps prevent insects and moisture from creeping behind the siding and potentially causing problems. Thanks to our end-matching system, we have eliminated 80% of caulking. The only recommended caulking areas are on butt joints where the joints aren’t tongue-n-grooved or end-matched. This is most common when the siding butts into the corner and trim pieces.
We hope you find these ideas helpful for installing log siding on your cabin or home. More related log cabin building materials can be found at loghomeshoppe.com.


