 Store Location
How To Install A Wood-Burning Stove In A Log Cabin
What comes to mind when you hear ‘wood-burning stoves’? Most people think about sitting in front of a black stove that generates heat and watching red flames through the glass door. They offer several benefits, including cost savings, energy independence, and a cozy ambiance. They can be a more economical heating option than relying solely on electricity or fossil fuels, especially if you have access to free or low-cost wood.
Wood-burning stoves provide a reliable heat source during power outages and can offer a sense of self-sufficiency with cooking and heating water. Beyond the practical advantages, wood stoves can also create a calming and inviting atmosphere, enhancing the overall comfort of a log cabin. Before you can enjoy all these benefits, you must select a stove and install it.
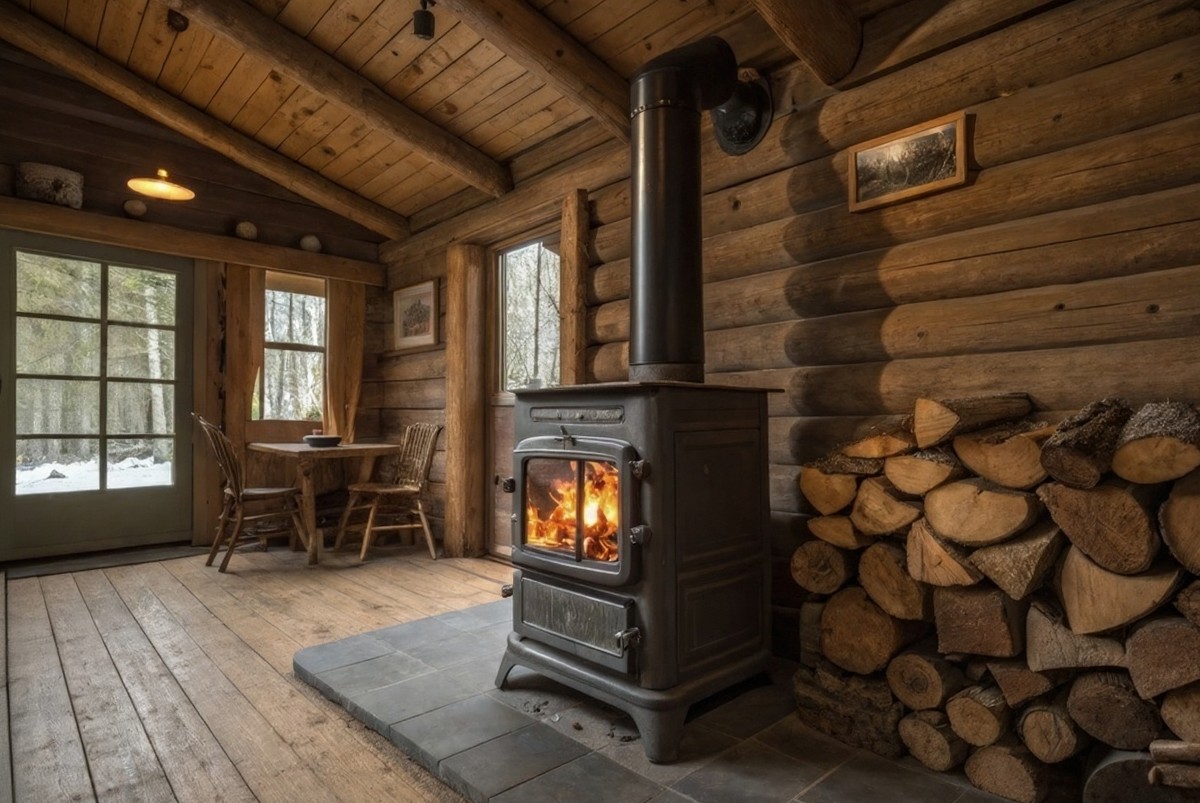
Types Of Log Cabin Wood-Burning Stoves
Wood-burning stoves can be broadly categorized into catalytic and non-catalytic. Further distinctions are based on their construction materials (steel, cast iron, or soapstone) and heating style (radiant or convective). Some stoves are designed for specific purposes like cooking or heating large spaces, and there are hybrid models combining features of different types of stoves.
- Catalytic Stoves use a catalytic combustor often coated with precious metals like palladium or platinum to ignite smoke and other emissions at lower temperatures. They create more complete combustion and longer burn times. These stoves tend to be more efficient and produce less creosote but require more maintenance and can be more expensive.
- Non-Catalytic Stoves use a baffle system to introduce oxygen into the firebox to promote combustion. They are generally less expensive, easier to maintain, and more common than catalytic stoves. These stoves are the type we typically think of sitting by a pile of firewood in a cabin.
Stove Installation Steps
Homeowners can install wood-burning stoves if they possess the knowledge and skills to perform basic woodworking tasks and an understanding of stoves and their operation. When you don’t have these skills or don’t feel comfortable tackling this project, hire a professional to do the job. Installing a typical wood-burning stove requires these steps in order:
- Select the room or rooms for the best heat distribution. These stoves mainly heat one room or two rooms but not the entire home.
- Strategically locate your wood-burning stove where it has sufficient clearance from a wall and other objects which is typically 30 inches. Do not place it below rafters, wires, pipes, or other obstructions in the attic.
- Obtain permits from the local building department, tell your insurance company, and have it inspected.
- Install the floor protector pad with the stove centered on it.
- Cut a hole in the ceiling and roof for the stove pipe and remove the insulation. Install the pipe to the correct height above the roof and lay out the roof flashing. *Place the pipe with proper clearance from joists or rafters.
- Install the ceiling support boxes in the ceiling and from the roof with the flaps under the shingles.
- Add the wall protection if needed according to local building codes.
At this point, you are about halfway through the installation process. Finish the steps professionally for a reliable and safe wood-burning stove. You must decide whether to use double or triple-wall stove pipes when you purchase the stove.
“Wood-burning stoves provide a reliable heat source during power outages and can offer a sense of self-sufficiency.”
- Install the roof flashing over the shingles and apply exterior-grade silicon caulking under the flashing.
- Add the rest of the stove pipe above the roof followed by the storm collar and fire-grade silicone sealant to both to hold it in place. Add a stand-off pipe brace if needed.
- Next, install the stove pipe cap to keep the elements out of the pipe.
- Install an attic insulation shield around the ceiling support box in the attic.
- Place the stove on its protector pad in the correct place.
- Install the stove pipe, and secure the pieces together and to the stove collar.
- Insert the fire bricks into the stove to line the sides and bottom of your stove.
- Light a small test fire to check for any smoke leaks inside and outside the house.
Some stove experts advise building a fire in the stove in the yard to “cure” it before bringing it into the house. Ask the stove manufacturer if this is important or not with their brand of stoves.
Operating Tips For Your Stove
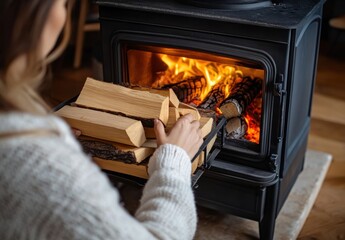 To operate a wood-burning stove safely and efficiently, start with dry, seasoned wood and use proper lighting techniques. Never use gasoline or other explosive products to start a fire. Maintain a hot fire with adequate airflow, and regularly remove ashes. Always store ashes in a fireproof container away from the house, garage, or shed. Ensure proper ventilation and consider safety measures like smoke and carbon monoxide detectors. Do not stack firewood against the side of your house for safety reasons.
Best Types Of Wood To Burn
If they are available, the best fuel efficient woods are oak, ash, hickory, beech, and maple. If they are not available, you can try fruit tree woods and birch. Be cautious with pine and other softwoods, green, and unseasoned wood because they can burn unevenly and create excessive creosote. Do not burn treated lumber or trash in your stove because they can contain toxins.
We hope these tips are helpful for installing and operating a safe and efficient wood-burning stove in your log cabin.


