 Store Location
How To Replace An Old Damaged Floor With Knotty Pine
Is it time to remove and replace an old, damaged floor? Do you plan to do it yourself or hire a flooring professional? If you plan to tackle the project yourself, you need to know how to safely remove wood, linoleum, or ceramic tile, depending on your case.
Once the old flooring material is removed, you must prep and clean the subfloor. The new knotty pine flooring should be installed professionally to achieve the desired results. Decide how you will dispose of the removed materials before beginning the work. Let’s look at the steps to take to do a great job.
Removing Old Wood Flooring
Removing old softwood or hardwood floors involves carefully cutting planks into smaller, manageable sections with a circular saw. Prying them up with a pry bar and mallet, then remove embedded nails or staples with pliers or a nail puller. Cleaning the subfloor is the last step before installing new flooring. Gather the tools and follow these removal steps:
- Circular Saw: Use a manageable size saw for cutting planks.
- Pry Bar & Mallet/Hammer: For removing baseboards and lifting boards.
- Pliers & Nail Puller: For stubborn fasteners.
- Magnetic Sweeper: To find and collect nails and staples.
- Safety Gear: Gloves, safety glasses, dust mask, steel-toed boots.
Step-by-Step Removal
- Prepare the Area: Remove baseboards and trim to expose floor edges. Work from the far end of the room toward the exit.
- Cut the Boards: Use a circular saw to cut planks into 1-2 foot sections, ensuring the blade depth is just enough to cut the wood, not the subfloor.
- Pry Up Sections: Insert a pry bar under a cut section and gently lift, using a mallet for stubborn spots. Work slowly to avoid breaking the tongue and groove if salvaging wood.
- Remove Fasteners: Pull nails and staples from the subfloor using pliers or a nail puller; a magnetic sweeper helps collect them.
- For Glued Floors: Cut along seams with a utility knife and use wedges or chisels to separate sections, potentially needing solvents for strong glue. Cut and use a chisel or floor scraper to separate boards from the subfloor is key, while carefully working from corners or ends helps preserve wood if reusing.
- Clean Up: Sweep and vacuum thoroughly to remove all dust, staples, and debris before installing new flooring. View this video for more information.
Removing Tile And Linoleum Flooring
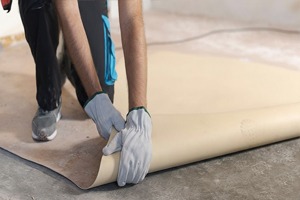
Removing tile and linoleum involves scoring, heating with a heat gun or iron, and prying/scraping them up. Wear gloves and a mask, then prepare the subfloor by scraping away stubborn adhesive with a razor scraper or oscillating tool, removing baseboards for complete access, and cleaning the surface before laying the new flooring. Use these steps:
Linoleum Removal Steps (Sheet & Tile)
- Prep: Remove baseboards and toilets (if necessary) to get full access to the edges.
- Score: Cut linoleum into manageable 6-12 inch strips with a utility knife.
- Heat: Use a heat gun (or an iron for peel-and-stick) to warm sections, softening the adhesive underneath.
- Lift & Scrape: Slide a pry bar or scraper under the heated sections to lift and pull up.
- Clean Adhesive: Use a razor scraper or oscillating tool with a scraper blade for stubborn glue blobs.
- Subfloor Prep: Address dips or high spots in the subfloor before installing new flooring.
- Watch this video for more removal tips.
Tile Removal Steps (Ceramic/Vinyl)
- Safety First (Asbestos Check): Test for asbestos if the home was built before the 1980s; if present, call a pro.
- Heat Tiles: Heat individual tiles with a heat gun to loosen the adhesive, moving the gun constantly to avoid melting.
- Pry Up: Insert a pry bar into the heated area to lift the tile.
- Remove Adhesive: Use a scraper or oscillating tool for leftover adhesive.
- Subfloor Prep: Address dips or high spots in the subfloor and clean thoroughly before installing new flooring.
“Is it time to remove and replace an old, damaged floor? The new knotty pine flooring should be installed professionally to achieve the desired results.”
Installing Knotty Pine Flooring
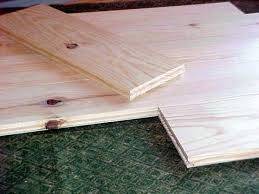
You will achieve the best results by installing tongue and groove, end-matching knotty pine flooring. Properly kiln-dried flooring that is defect-free is available in widths to meet your needs at fair prices. Order the amount needed with a little extra and use this plan for the project:
Preparation
- Acclimate Wood: Let the pine boards sit in the room for several days to adjust to the temperature and humidity.
- Prepare Subfloor: Ensure the subfloor is clean, flat, and dry; use contractor's paper or an underlayment for moisture control, especially over concrete or crawl spaces.
- Snap Chalk Lines: Mark the longest wall with a chalk line for a straight starting point.
- Plan Joints: Position end joints (butt joints) over floor joists when possible and stagger them at least 18 inches apart.
Installation Steps
 First Row (Groove to Wall): Place the first board with the groove facing the wall, leaving a 1/4-inch expansion gap with spacers. Face-nail along the base into joists, countersinking the nails.
- Subsequent Rows (Blind Nailing): Slot the next board's tongue into the first board's groove. Use a rubber mallet to tap joints tight and blind-nail (or secret-nail) at a 45-degree angle through the tongue into the joists.
- Stagger Joints: Use the cut-off piece from the last board to start the next row, ensuring end joints are staggered over joists when possible.
- Doorways: Undercut door jambs so the flooring slides underneath for a seamless look.
- Final Row: The last row often needs to be ripped (cut lengthwise) to fit the width of the last open space. Use a pull bar or hammer to close the joint, then face-nail if necessary, covering holes with wood putty.
Once the flooring boards are installed, fill visible nail holes with matching wood putty for a smooth and finished look, then sand. If you use unfinished knotty pine wood, stain it the desired color, let dry thoroughly, and apply a clear top coat. The project is much easier if you use pre-finished pine flooring. Finish the job by installing the baseboards, stand back and admire the work.


